React ch.04
Bootstrap & Jquery 활용하여 웹페이지 디자인하기
-
bootstrap 사이트에서 bootstrap을 다운로드
-
/react-ingredients/public경로에 css폴더 생성
-
/css 폴더 내에 다운로드한 bootstrap에 들어있는 css 경로에서 두개의 파일 복사해온다.
bootstrap-theme.min.css bootstrap.min.css
-
jquery사이트에서 Jquery 다운로드
Download the compressed, production jQuery 3.2.1
-
다운받은 js파일을 /react-ingredients/js 폴더에 복사
-
/src/components/ListManager.jsx 수정
render: function() { return ( <div className="col-sm-4"> <div className="panel panel-default"> <div className="panel-heading"> <h3>{this.props.title}</h3> </div> <div className="panel-body"> <form onSubmit={this.handleSubmit}> <input onChange={this.onChange} value={this.state.newItemText} /> <button>Add</button> </form> <List items={this.state.items} /> </div> </div> </div> ); } -
/public/index.html 에 bootstrap 링크 입력
 <!DOCTYPE html>
 <html>
     <head>
         <title>CommonJS React Skeleton</title>
         <link rel="stylesheet" href="css/bootstrap.min.css">
         <link rel="stylesheet" href="css/bootstrap-theme.min.css">
     </head>
     <body>
         <div id="ingredients">
         </div>
     <script src="js/jquery-1.11.3.min.js"></script>
     <script src="js/main.js"></script>
     </body>
 </html>
여기까지는 많이 바뀌지 않음..
-
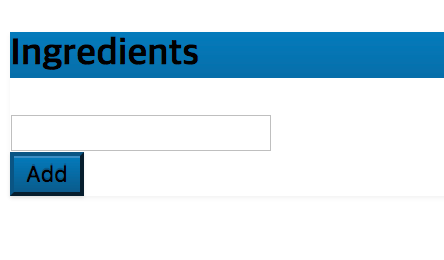
$ npm start실행해주면, css적용된 페이지를 확인할 수 있다. -
/src/components/ListManager.jsx 추가 수정(button, input css)
render: function() { var divStyle ={ marginTop: 10 } return ( <div style={divStyle} className="col-sm-4"> <div className="panel panel-primary"> <div className="panel-heading"> <h3>{this.props.title}</h3> </div> <div className="row panel-body"> <form onSubmit={this.handleSubmit}> <div className="col-sm-9"> <input className="form-control" onChange={this.onChange} value={this.state.newItemText} /> </div> <div className="col-sm-2"> <button className="btn btn-primary">Add</button> </div> </form> <List items={this.state.items} /> </div> </div> </div> ); } -
위 코드에서 눈여겨 볼 것은, react는 코드 내에서 css style을 수정할 수 있다는 것이다.
var divStyle ={ marginTop: 10 } -
결과확인

